Unlocking the secret to consistently perfect, non-stick waffles starts long before you mix your first batch of batter. For many waffle maker owners, the very first step—seasoning your new appliance—is often overlooked, yet it’s absolutely critical for optimal performance and longevity. Whether you’ve invested in a traditional cast iron model or a modern electric unit, understanding how to properly season your waffle maker before its initial use ensures your culinary creations release effortlessly and your appliance remains in prime condition for years to come. This comprehensive guide will walk you through the precise steps, tailored to your specific waffle maker type, ensuring every waffle you make is a golden, crispy success.
Why Seasoning Your Waffle Maker is Crucial for Success
Seasoning a waffle maker, particularly for its inaugural use, is more than just an optional step; it’s a foundational practice for superior cooking results and appliance care. This process involves baking a thin layer of oil onto the cooking surfaces, which polymerizes to create a natural, durable non-stick coating. Beyond preventing waffles from sticking stubbornly, proper seasoning also acts as a protective barrier, safeguarding the metal from rust and corrosion, especially for cast iron models. A well-seasoned waffle maker ensures even heat distribution, contributes to a beautiful, uniform crust on your waffles, and simplifies the cleaning process after each use.
Understanding Your Waffle Maker: Cast Iron vs. Non-Stick Surfaces
The method for seasoning your waffle maker largely depends on its construction. Different materials require different approaches to achieve that coveted non-stick finish. Understanding these differences is key to successful preparation.
Cast Iron Waffle Makers: The Traditional Approach
|
Our Picks for the Best Waffle maker in 2026
As an Amazon Associate I earn from qualifying purchases.
|
||
| Num | Product | Action |
|---|---|---|
| 1 | Cuisinart Waffle Maker, 1250W Round Classic Waffle Iron, 5-Setting Adjustable Browning Control, WMR-CAP2, Brushed Stainless |

|
| 2 | Dash Mini Waffle Maker- Compact Electric Iron for Creative Homemade Treats - Nonstick Surface - Easy-to-Clean - Perfect for Kids & Families - Aqua |
|
| 3 | bella Classic Rotating Belgian Waffle Maker with Nonstick Plates, Removable Drip Tray, Adjustable Browning Control and Cool Touch Handles, Black |
|
| 4 | Elite Gourmet EWM015MX Electric Nonstick 4.5-inch Mini Waffle Maker, Belgian Waffles, Compact Design, Hash Browns, Keto, Snacks, Sandwich, Eggs, Easy to Clean, Mint |
|
| 5 | Cuisinart Waffle Maker, 1250W Round Classic Waffle Iron, 5-Setting Adjustable Browning Control, WMR-CANAS, Brushed Stainless |
|
| 6 | OSTBA Waffle Maker, 2 Slice Non-Stick Waffle Iron, Belgian Waffle Machine with Indicator Lights, PFOA Free, Perfect for Breakfast and Snacks, 750W |
|
| 7 | Cuisinart Round Flip Belgian Waffle Maker, Black/Silver, 1 inch thick, WAF-F30NAS |
|
| 8 | Waffle Maker, Rotating Belgian Waffle Maker, 180° Flip Waffle Iron, Non-Stick Plate, Adjustable Browning Control, Foldable Cool Touch Handle, Removable Drip Tray, Space Saving Storage, Stainless Steel |
|
| 9 | Dash No-Drip Waffle Maker - Quad Waffle Maker for Hassle-Free Breakfasts - Dual Nonstick Heating Plates & Quick Heat-Up System - Easy-Release Surface - Silver |
|
| 10 | KRUPS 4-Slice Belgian Waffle Maker: Stainless Steel, 5 Browning Levels, Audible Ready Beep, Removable Plates, 1200W, Silver/Black, Large Waffle Maker Family Size, Great for Family Breakfasts |
|
Cast iron waffle makers, often cherished for their durability and ability to retain heat, feature porous surfaces that readily absorb and bond with oil during the seasoning process. This traditional material benefits immensely from a thorough seasoning to fill these microscopic gaps, creating a smooth, slick cooking surface. New cast iron units often come with a protective paraffin wax coating, which must be completely removed before seasoning to ensure proper polymerization of the oil. This initial, more intensive seasoning is vital for developing the deep, dark patina that cast iron enthusiasts adore.
Modern Non-Stick Electric Waffle Makers: Simpler Preparation
Most contemporary electric waffle makers come equipped with factory-applied non-stick coatings, such as Teflon or ceramic. While these surfaces inherently reduce sticking, they still benefit from a lighter initial seasoning to “cure” the surface and optimize its release properties. This step helps to further enhance the non-stick capabilities and can extend the life of the coating. For these types of machines, the seasoning process is generally less rigorous than for cast iron, acting more as a preparatory wipe-down and heat treatment.
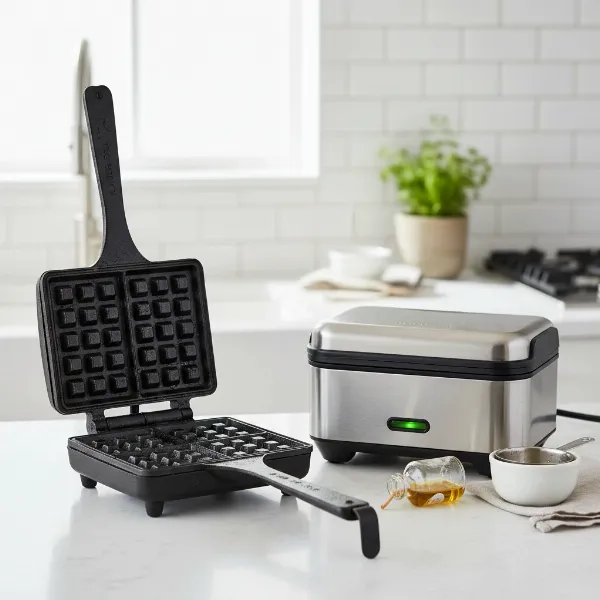 Two types of waffle makers, cast iron and electric, prepared for seasoning.
Step-by-Step Guide: How to Season Your Waffle Maker for Its First Use
The procedure for seasoning varies significantly based on whether you own a cast iron or an electric non-stick waffle maker. Follow the instructions relevant to your appliance for the best results.
For Cast Iron Waffle Makers (Manual or Stovetop)
Cast iron waffle makers demand a more thorough seasoning process to establish a lasting non-stick surface and protect against rust. This method often applies to stovetop models or those used over an open flame.
- Gather Your Supplies: You’ll need a high smoke point cooking oil (like flaxseed, grapeseed, or sunflower oil), a stiff brush or scouring pad, dish soap, warm water, a lint-free cloth or paper towels, and heat-resistant gloves.
- Initial Cleaning (Remove Wax/Factory Coating): If your new cast iron waffle maker has a protective wax coating (often found on new cast iron), you must remove it first.
- Method 1 (Scouring): Use hot, soapy water and a stiff brush or scouring pad to thoroughly scrub off the wax. Rinse well and dry completely.
- Method 2 (Burning Off): Place the waffle maker in a hot oven (around 400-500°F / 200-260°C) or over a campfire flame until the wax burns off. Allow to cool, then wash with hot soapy water and dry thoroughly.
- Thorough Cleaning: Even if no wax is present, wash the entire waffle maker with warm, soapy water and a brush. Rinse thoroughly and dry it immediately and completely with a towel to prevent rust. You can also place it on a low heat setting on the stove or in the oven for a few minutes to ensure all moisture has evaporated.
- Applying the Oil: Once completely dry, apply a very thin and even layer of your chosen high smoke point oil to all cooking surfaces, including the grid patterns. Use a paper towel or a thin-bristled basting brush to spread the oil. Crucially, wipe off any excess oil with a clean, dry cloth or paper towel; too much oil can lead to a sticky, gummy surface rather than a smooth, seasoned one.
- The Heating Process:
- Oven Method: Preheat your oven to a high temperature, typically 450-500°F (230-260°C). Place the waffle maker (open, grids facing up and down) in the preheated oven for 1 hour. Turn off the oven and allow the waffle maker to cool completely inside the oven.
- Stovetop/Appliance Method: Preheat the waffle maker to its highest setting (around 280°C if specified). Close the irons. Once hot, apply a thin coat of vegetable oil with a brush. Close the irons and allow the oil to heat for 10 minutes. Repeat this oiling and heating process at least once more, or several times for a deeper seasoning.
- Cooling and Final Wipe: After heating, let the waffle maker cool down completely. Once cool, wipe down the surfaces once more with a clean, dry cloth to remove any residual oil. Your cast iron waffle maker is now ready for its first delicious batch!
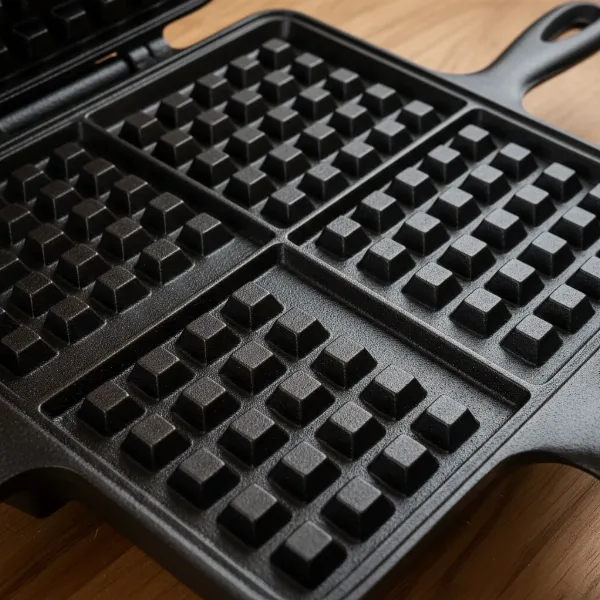 Close-up of a perfectly seasoned cast iron waffle maker grid, ready for cooking.
For Electric Non-Stick Waffle Makers
Electric waffle makers with non-stick coatings require a simpler, yet still important, preparation.
- Initial Wipe-Down: Before the first use, wipe down the cooking plates with a damp cloth to remove any dust or manufacturing residues. Then, dry them completely with a soft, clean towel.
- Lightly Oiling the Grids: Using a pastry brush or a paper towel, lightly coat both the upper and lower cooking grids with a small amount of neutral cooking oil (like vegetable, canola, or sunflower oil). You don’t need much—just enough to create a thin sheen.
- Preheating and Curing: Close the waffle maker and plug it in. Allow it to preheat fully until the indicator light signals it’s ready. Let it heat for an additional 5-10 minutes with the oil on the plates. This process helps to cure the initial non-stick layer.
- Cooling: Unplug the waffle maker and let it cool down completely. Once cool, it’s ready for its first use. You may want to wipe off any excess oil if necessary.
Beyond the First Seasoning: Maintaining Your Waffle Maker’s Non-Stick Performance
Proper initial seasoning sets the stage, but ongoing care ensures your waffle maker performs flawlessly for years. Even with a perfect first seasoning, you might need to re-season occasionally.
“Think of seasoning as building a protective, culinary shield for your waffle maker. The initial application is the foundation, but gentle care and occasional re-seasoning are what keep that shield strong, ensuring effortless releases every time.” – Sarah Chen, Waffle Maker Care Specialist
Indicators for Re-seasoning: If you notice waffles beginning to stick consistently, or if the cooking surface appears dull, grey, or rusty (for cast iron), it’s a clear sign that re-seasoning is due. For non-stick electric models, consistent sticking might suggest the factory coating is wearing, and a light re-oiling before each use can help.
Cleaning Tips to Preserve Seasoning:
- Always allow your waffle maker to cool slightly before cleaning.
- For cast iron, avoid harsh soaps or abrasive scrubbers, which can strip away the seasoning. Simply wipe with a damp cloth or a soft brush and hot water, then dry thoroughly and apply a very light coat of oil if storing.
- For electric non-stick models, use a damp cloth or paper towel to wipe down the grids. Never submerse the unit in water.
- Regularly wipe down the exterior of your waffle maker to keep it clean.
Conclusion
Taking the time to properly season your new waffle maker before its first use is an investment that pays dividends in perfectly cooked waffles and extended appliance life. Whether you’re working with the robust charm of cast iron or the convenience of a modern electric non-stick model, a few simple steps can dramatically improve your cooking experience. By understanding the unique needs of your waffle maker’s surface and applying the correct seasoning technique, you’re ensuring that every waffle releases beautifully and tastes delicious. So, are you ready to unlock the full potential of your waffle maker and embark on a journey of culinary delights?
Frequently Asked Questions
What kind of oil should I use for seasoning my waffle maker?
For cast iron, high smoke point oils like flaxseed, grapeseed, or sunflower oil are excellent as they polymerize well. For non-stick electric models, any neutral cooking oil like vegetable or canola oil will suffice for a light initial coat.
Do all waffle makers need to be seasoned?
While cast iron waffle makers require a thorough initial seasoning to build a non-stick surface and prevent rust, most modern electric non-stick waffle makers only need a light oiling and heat treatment before their first use to optimize performance.
How often should I re-season my waffle maker?
For cast iron, re-season when food starts sticking or if the surface appears dull or rusty, which could be after heavy use. For electric non-stick models, a light brushing of oil before each use is generally enough to maintain performance.
What happens if I don’t season my waffle maker?
If you don’t season a cast iron Waffle Maker, food will likely stick, and it will be prone to rust. For non-stick electric models, skipping the initial oiling might result in waffles sticking more often, especially during the first few uses.
Can I use cooking spray instead of oil for seasoning?
While cooking spray can be convenient for daily use, it is generally not recommended for initial seasoning or heavy re-seasoning. Many sprays contain additives that can build up over time, leading to a sticky residue rather than a smooth, seasoned surface.