Ah, the glorious aroma of freshly-made waffles wafting through the kitchen. It’s the scent of lazy Sunday mornings, special occasion brunches, and pure, unadulterated comfort. But turning that dream into a delicious reality starts with mastering your key appliance. Learning How To Use A Waffle Maker is your first step into a larger, crispier, and more wonderful world. Forget those sad, frozen discs from the grocery store. We’re here to unlock the secrets to creating golden, fluffy-on-the-inside, crisp-on-the-outside waffles right in your own home. And trust me, it’s easier than you think.
Why Even Bother with a Waffle Maker?
You might be wondering, “Is another kitchen gadget really necessary?” Let me put it this way: comparing a homemade waffle to a store-bought one is like comparing a live concert to listening to a song on a tinny radio. There’s simply no contest. A dedicated waffle maker gives you:
- Unbeatable Texture: That signature crispy exterior and airy, light interior can only be achieved with the direct, even heat of a waffle iron’s plates.
- Endless Customization: You control the ingredients. Want to make savory cheddar and chive waffles? Go for it. Gluten-free? Easy. Chocolate chip-studded dessert waffles? Absolutely. Your machine is a canvas for your culinary creativity.
- Pure Joy: There’s something incredibly satisfying about lifting the lid to reveal a perfectly formed, steaming waffle that you made. It’s a small kitchen victory that starts the day off right.
Belgian vs. Classic: Picking Your Player
Before you can become a waffle wizard, you need to know your wand. Waffle makers generally fall into two main categories, and the difference is more than just looks.
The Mighty Belgian
A Belgian waffle maker is what most people picture. It’s characterized by its deep, large pockets—perfect for holding generous pools of syrup, melted butter, or piles of fruit. The waffles themselves are typically thicker, lighter, and fluffier. If you love a substantial, restaurant-style waffle, this is your champion. Many high-end models, including the popular “flip” style that ensures even batter distribution, are Belgian.
The Timeless Classic
Also known as an American-style waffle maker, this machine produces thinner, crisper waffles with smaller, shallower pockets. Think of the kind you’d get at a classic diner. They have a denser texture and a more pronounced crunch. They’re fantastic for making waffle sandwiches or for those who prefer a higher crisp-to-fluff ratio.
|
Our Picks for the Best Waffle Maker in 2025
As an Amazon Associate, we earn from qualifying purchases.
|
||
| Num | Product | Action |
|---|---|---|
| 1 | DASH Mini Waffle Maker - 4” Waffle Mold, Nonstick Waffle Iron with Quick Heat-Up, Nonstick Surface - Perfect Mini Waffle Maker for Kids and Families, Just Add Batter (Red) |

|
| 2 | Car Mini Waffle Maker- Xmas Gift for Him- Make 7 Different Race Cars Trucks & Automobile Vehicle Shaped Pancakes for Kids Adults- Electric Waffler Iron w Recipe Guide, NonStick Pan Cake Baker Machine |
|
| 3 | CROWNFUL Mini Waffle Maker, 4\" Chaffle Maker with Compact Design, Easy to Clean, Non-Stick Surface, Recipe Guide Included, Perfect for Breakfast, Dessert, Sandwich, or Other Snacks |
|
| 4 | MasterChef Bubble Waffle Maker- Electric Non stick Hong Kong Egg Waffler Iron Griddle w FREE Recipe Guide- Ready in under 5 Minutes |
|
| 5 | Ninja BW1001 NeverStick PRO Belgian Waffle Maker, Vertical Design, 5 Shade Settings, with Precision-Pour Cup & Chef-curated Recipe Guide, Black & Silver |
|
| 6 | Chefman Rotating Belgian Waffle Maker, 180° Flip Iron w/ Non-Stick Plates, Adjustable Timer, Locking Lid, & Drip Plate, Space Saving Storage, Mess-Free Breakfast, Stainless Steel/Black |
|
| 7 | Bubble Waffle Maker- Electric Non stick Hong Kong Egg Waffler Iron Griddle w/Ready Indicator Light- Ready in under 5 Mins- Recipe Guide Included, Make Delicious Ice Cream Cones for Xmas Gift or Treat |
|
| 8 | BELLA 17175 Bubble Maker w, Rapid Quickly Make Fluffy 9” Authentic Hong Kong Breakfast or Dessert, Healthy-Eco Non Stick Coating, Easy to Clean Waffle Iron, 120 Volts, Cone Rack Included, White |
|
| 9 | DASH Multimaker Mini System - Waffle Maker with Six 4” Removable Plates: Waffle Iron & Griddle, 4-in-1 Mini Waffle Maker for Kids and Families – Nonstick Surface, Just Add Batter (Aqua) |
|
| 10 | CROWNFUL Mini Waffle Maker, 4\" Chaffle Maker with Compact Design, Easy to Clean, Non-Stick Surface, Recipe Guide Included, Perfect for Breakfast, Dessert, Sandwich, or Other Snacks |
|
Key Features That Separate the Great from the Good
When you’re shopping or getting to know your new machine, keep an eye out for these game-changing features:
- Browning Control: This is non-negotiable for the serious waffle enthusiast. An adjustable dial lets you choose your perfect shade, from soft and light golden to deep, dark, and extra-crispy. It’s the difference between a good waffle and your perfect waffle.
- Indicator Lights & Sounds: A simple light or an audible beep that tells you when the machine is preheated and when your waffle is done takes all the guesswork out of the process. No more peeking!
- Non-Stick Surface: A quality non-stick coating is your best friend. It ensures your waffles release cleanly every single time without leaving half the batter stuck to the plates. Look for ceramic or PFOA-free coatings for peace of mind.
- Removable Plates: This is a game-changer for cleaning. Models with dishwasher-safe removable plates turn a potentially tedious cleanup into a breeze.
- Drip Tray / Overflow Channel: Batter happens. An overflow channel, often called a “moat,” catches any excess batter before it drips all over your counter. Some models come with a separate drip tray that slides underneath.
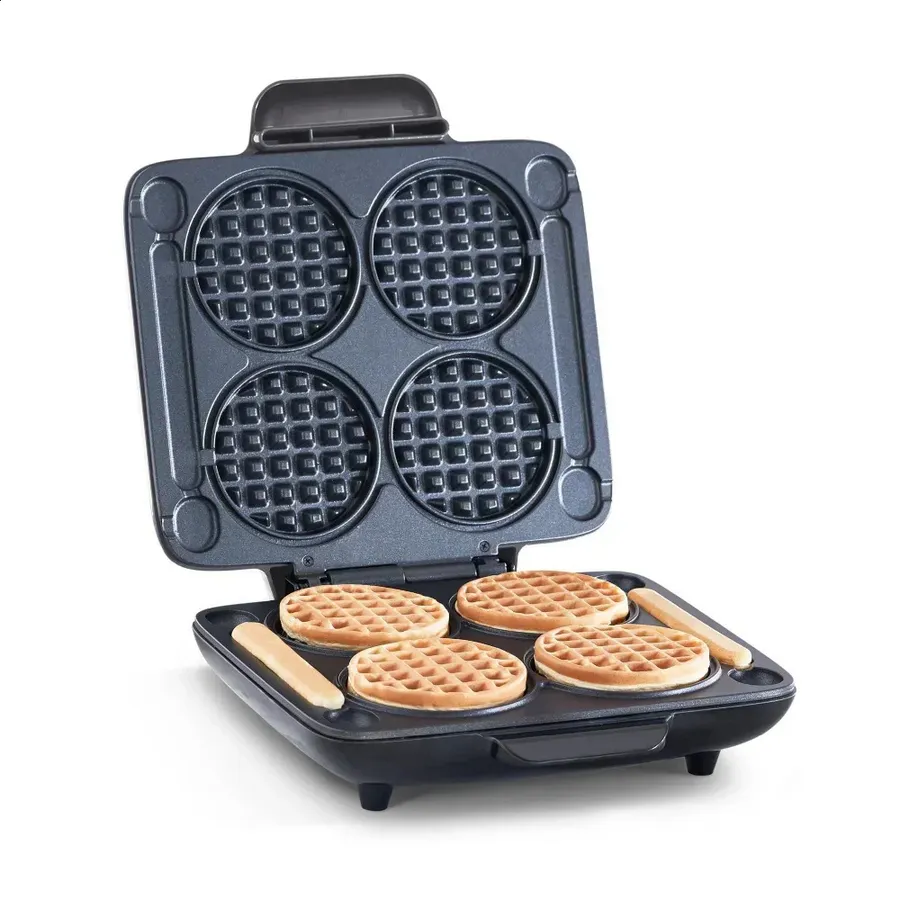
How to Use a Waffle Maker: Your Step-by-Step Ritual
Ready to make some magic? Here is the universal method that works for nearly every electric waffle maker on the market.
- Find a Home: Place your waffle maker on a flat, dry, heat-resistant surface. Make sure it’s away from any walls or items that can’t handle a little steam.
- The First Run (Important!): If your machine is brand new, it might have a slight chemical smell from the factory. Season it by wiping the plates with a damp cloth, drying them, and then brushing a light coat of neutral oil (like canola or vegetable oil) onto the plates. Plug it in, heat it up for about 5 minutes, and then let it cool completely. Wipe away any excess oil. This pre-seasoning burns off any manufacturing residue and preps your non-stick surface.
- Preheat, Preheat, Preheat: This is the most crucial step. Never pour batter onto cold plates. Plug in your machine and set your desired browning level. Wait for the “Ready” indicator light to turn on or for the machine to beep. This ensures the plates are hot enough to instantly seal the outside of the waffle, creating that essential crisp crust.
- Get Greasy (or Not): Even with non-stick plates, a little insurance doesn’t hurt. Lightly brush the top and bottom plates with melted butter or a neutral oil. A pastry brush is perfect for this. Avoid cooking sprays, as they can build up a sticky residue over time that ruins the non-stick coating.
- Pour with Purpose: Ladle your batter into the center of the bottom plate. Start with a little less than you think you need—you can always add more next time. Aim to cover about two-thirds of the surface; the batter will expand as it cooks.
- Close and Wait: Close the lid gently but firmly. Don’t press down. If you have a flip-style Belgian waffle maker, now is the time to flip it 180 degrees. This motion helps the batter spread evenly for a perfectly formed waffle.
- Trust the Machine: Resist the temptation to open the lid and peek. This releases steam and can cause your waffle to tear and cook unevenly. Wait for the indicator light or the beep. Cooking time usually ranges from 3 to 6 minutes, depending on your machine and browning setting.
- The Grand Finale: Once the cycle is complete, carefully open the lid. Your waffle should be golden and steaming. Use a non-metal utensil, like a silicone spatula or wooden tongs, to gently lift the waffle from the plate. Metal utensils will scratch and destroy your non-stick surface.
Pro-Tip: For extra-crispy waffles, let your finished waffle rest for about 30 seconds on a wire cooling rack before serving. This allows excess steam to escape instead of making the bottom soggy.
How Do You Clean a Waffle Maker Without Losing Your Mind?
Cleaning a waffle maker is the part everyone dreads, but it doesn’t have to be a nightmare. The key is to clean it while it’s still slightly warm.
The easiest way to clean a waffle maker is to first let it cool down until it’s just warm to the touch. Use a dry paper towel to wipe up any oil and larger crumbs. Then, use a damp, soft cloth or sponge to gently wipe the plates clean.
For a more detailed clean:
- Unplug It: Safety first! Always make sure the machine is unplugged and cool enough to handle.
- The Dry Wipe: Use a paper towel to absorb any leftover grease and brush away loose crumbs.
- The Damp Wipe: Take a soft, damp cloth (not soaking wet) and wipe down the interior grids. For stubborn, cooked-on bits, dampen a paper towel, place it inside the closed waffle maker for a few minutes to let the steam soften the gunk, then wipe it away.
- Deep Clean crevices: A soft-bristled toothbrush or a Q-tip is perfect for getting into the nooks and crannies of the grid.
- Wipe the Outside: Finish by wiping the exterior of the machine with a damp cloth.
Pro Tips for Waffle Nirvana Every Single Time
Ready to level up? Here are a few secrets from the Waffle Maker Guide test kitchen.
- Let Your Batter Rest: After mixing your batter, let it sit for 10-15 minutes. This allows the gluten to relax and the leavening agents to activate, resulting in a more tender waffle.
- Don’t Overmix: Mix your wet and dry ingredients until they are just combined. A few lumps are perfectly fine! Overmixing develops too much gluten, leading to tough, chewy waffles instead of light, airy ones.
- Use Melted Butter: For the richest flavor and best browning, use melted butter in your batter instead of oil.
- Separate Your Eggs: For the fluffiest waffles imaginable, separate the eggs. Mix the yolks into the wet ingredients as usual. Beat the egg whites separately until stiff peaks form, then gently fold them into the finished batter right before cooking.
As our go-to kitchen appliance expert, Chef Isabella Rossi, always says, “The secret to a perfect waffle isn’t just in the batter; it’s in the consistent, edge-to-edge heat that only a quality machine can provide. Treat it well, and it will reward you every time.”
Frequently Asked Questions
Q: Can you use pancake mix in a waffle maker?
A: Yes, you can, but it won’t be ideal. Pancake batter is thinner and has less fat and sugar. The result will be a softer, more cake-like waffle that lacks the classic crispness. For best results, add an extra tablespoon of oil or melted butter and an extra tablespoon of sugar to your pancake mix.
Q: Why are my waffles soggy?
A: This is usually caused by one of two things: not preheating the waffle maker properly, or letting the waffle sit on a plate after cooking. Make sure your “Ready” light is on before pouring, and transfer cooked waffles to a wire rack to let steam escape.
Q: How much batter should I use in my waffle maker?
A: This depends on your machine, but a good rule of thumb is to start with about ½ to ¾ cup of batter for a standard round or square waffle maker. Pour it in the center and let it spread. It’s better to have a slightly smaller waffle than a huge overflow mess.
Q: What’s the difference between a waffle maker and a waffle iron?
A: The terms are often used interchangeably. Historically, a “waffle iron” was a cast-iron device used over a fire or on a stovetop. A “waffle maker” typically refers to the modern, self-contained electric appliance. Today, most people use “waffle maker” for the electric version.
Q: My waffles are sticking! What did I do wrong?
A: Sticking can happen if the plates aren’t hot enough, if there isn’t enough fat in your batter, or if the non-stick coating is wearing out or damaged by cooking spray. Always preheat fully and try brushing the plates with a little melted butter before each waffle.
Your Journey to Waffle Perfection
Mastering your waffle maker isn’t just about following steps; it’s about unlocking a world of delicious possibilities. From understanding the nuances of a Belgian versus a classic machine to knowing the small tricks that yield an extra-crispy crust, you’re now equipped with the knowledge to transform your breakfast game forever. This simple appliance is an investment in countless happy mornings and memorable meals.
So go ahead, dust off that machine, whip up a batch of your favorite batter, and get ready to create some magic. If you’re looking for the perfect machine to start your journey, check out our in-depth reviews. Now that you know how to use a waffle maker, we’d love to see your creations! Drop a comment below and share your first waffle-making adventure with our community.