Transforming everyday mac and cheese into crispy, golden-brown bites is a culinary trick that delights taste buds and offers a unique spin on a classic comfort food. With the humble waffle maker, you can unlock a world of crunchy exteriors and gooey, cheesy interiors, creating perfect snacks, appetizers, or even a fun side dish. As someone who has spent over a decade tinkering with waffle makers, from home models to professional cafe equipment, I’ve seen firsthand how these versatile machines can do so much more than just breakfast. Let’s dive into how you can expertly wield your waffle maker to create mac and cheese bites that are sure to impress.
The Waffle Maker: More Than Just Breakfast
Long gone are the days when a waffle maker was solely dedicated to sweet, syrupy breakfast creations. Today’s machines are kitchen powerhouses, capable of crisping up everything from hash browns to sandwiches and, yes, even macaroni and cheese. For mac and cheese bites, the type of waffle maker you use can influence the final texture and ease of preparation.
While most standard waffle makers will do the trick, a model with deep grids, often found in Belgian waffle makers, can create larger pockets, allowing for more surface area to crisp up and hold more of that cheesy goodness. A non-stick coating is absolutely crucial, ensuring your cheesy creations don’t cling to the plates, making both cooking and cleanup a breeze. Mini waffle makers are also excellent for individual, bite-sized portions, perfect for appetizers.
Essential Preparations for Perfect Mac and Cheese Bites
Achieving that ideal balance of crispy and creamy starts even before your mac and cheese touches the hot plates. Thoughtful preparation is key to preventing sticking, ensuring even cooking, and delivering maximum flavor.
Choosing Your Mac and Cheese
|
Our Picks for the Best Waffle maker in 2026
As an Amazon Associate I earn from qualifying purchases.
|
||
| Num | Product | Action |
|---|---|---|
| 1 | Dash Mini Waffle Maker- Compact Electric Iron for Creative Homemade Treats - Nonstick Surface - Easy-to-Clean - Perfect for Kids & Families - Aqua |

|
| 2 | Elite Gourmet EWM015MX Electric Nonstick 4.5-inch Mini Waffle Maker, Belgian Waffles, Compact Design, Hash Browns, Keto, Snacks, Sandwich, Eggs, Easy to Clean, Mint |
|
| 3 | Waffle Maker, Rotating Belgian Waffle Maker, 180° Flip Waffle Iron, Non-Stick Plate, Adjustable Browning Control, Foldable Cool Touch Handle, Removable Drip Tray, Space Saving Storage, Stainless Steel |
|
| 4 | Cuisinart Waffle Maker, 1250W Round Classic Waffle Iron, 5-Setting Adjustable Browning Control, WMR-CAP2, Brushed Stainless |
|
| 5 | bella Classic Rotating Belgian Waffle Maker with Nonstick Plates, Removable Drip Tray, Adjustable Browning Control and Cool Touch Handles, Black |
|
| 6 | Cuisinart Waffle Maker, 1250W Round Classic Waffle Iron, 5-Setting Adjustable Browning Control, WMR-CANAS, Brushed Stainless |
|
| 7 | Cuisinart Round Flip Belgian Waffle Maker, Black/Silver, 1 inch thick, WAF-F30NAS |
|
| 8 | KRUPS 4-Slice Belgian Waffle Maker: Stainless Steel, 5 Browning Levels, Audible Ready Beep, Removable Plates, 1200W, Silver/Black, Large Waffle Maker Family Size, Great for Family Breakfasts |
|
| 9 | Dash No-Drip Waffle Maker - Quad Waffle Maker for Hassle-Free Breakfasts - Dual Nonstick Heating Plates & Quick Heat-Up System - Easy-Release Surface - Silver |
|
| 10 | OSTBA Waffle Maker, 2 Slice Non-Stick Waffle Iron, Belgian Waffle Machine with Indicator Lights, PFOA Free, Perfect for Breakfast and Snacks, 750W |
|
The foundation of your waffle bites is, naturally, the mac and cheese itself. While you can certainly prepare a fresh batch, leftover mac and cheese is often preferred as it’s already cooled and firmed up, making it easier to handle and less prone to falling apart in the waffle maker. If using fresh mac and cheese, allow it to cool completely in the refrigerator for at least a few hours, or ideally overnight. The firmer consistency will help the bites hold their shape and develop a better crust. Avoid overly saucy mac and cheese, as excess liquid can lead to steaming rather than crisping.
Prepping for Success
To ensure your mac and cheese bites hold together and achieve that coveted golden crisp, a little binding and coating go a long way. Many recipes suggest adding a beaten egg to about 2 cups of cooled mac and cheese to act as a binder. For an extra layer of crunch, panko breadcrumbs can be mixed in or used as a coating. Some chefs even recommend incorporating a small amount of all-purpose flour directly into the mac and cheese mixture for added structure.
“The secret to perfectly crispy waffle mac and cheese bites lies in using cold, firm mac and cheese and sometimes a little extra binder like egg or panko. It’s all about creating that sturdy base for the ultimate crisp.” – Chef Anya Sharma, Culinary Innovator
Gear Check
Before you begin, ensure your waffle maker is ready. A good non-stick cooking spray is your best friend here, even if your machine boasts a non-stick surface. This provides an extra layer of protection against sticking and helps achieve a beautiful golden crust. Have a fork or a silicone spatula ready for carefully removing the hot bites without scratching your waffle maker’s plates.
Step-by-Step Guide: Waffling Your Mac and Cheese Bites
Once your mac and cheese is prepped, the waffling process is straightforward. Follow these steps for consistently delicious results:
- Preheat Your Waffle Maker: Plug in your waffle maker and allow it to preheat fully. Most models have an indicator light that signals when it’s ready, usually when it turns green or goes off. This ensures an even cooking temperature from the start.
- Grease Generously: Even with a non-stick surface, a light, even spray of cooking oil or butter on both the top and bottom plates is crucial. This prevents sticking, especially with gooey cheese, and helps form that desirable golden-brown exterior.
- Portion and Place: Scoop an appropriately sized portion of your prepared mac and cheese mixture. The amount will depend on your waffle maker’s size; typically, about 1/4 to 1/2 cup per waffle section is a good starting point. Place the mac and cheese directly onto the center of the bottom waffle plate.
- Close and Press: Gently close the lid of your waffle maker. You might need to press down firmly for a few seconds to help spread the mixture evenly across the grids. Be careful not to overfill, as excess mac and cheese will ooze out the sides.
- Cook to Perfection: Cook for 3-5 minutes, or until the mac and cheese bites are deeply golden brown and crispy on the outside. Cooking times can vary based on your waffle maker’s heat setting and the consistency of your mac and cheese. If your waffle maker has adjustable temperature, a medium-high setting usually works best.
- Carefully Remove: Once cooked, use a fork or silicone spatula to carefully lift the mac and cheese bites from the waffle maker. Avoid metal utensils that could damage the non-stick coating.
- Cool and Serve: Allow the bites to cool for a minute or two on a wire rack. This helps them firm up and become even crispier. Serve immediately with your favorite dipping sauces.
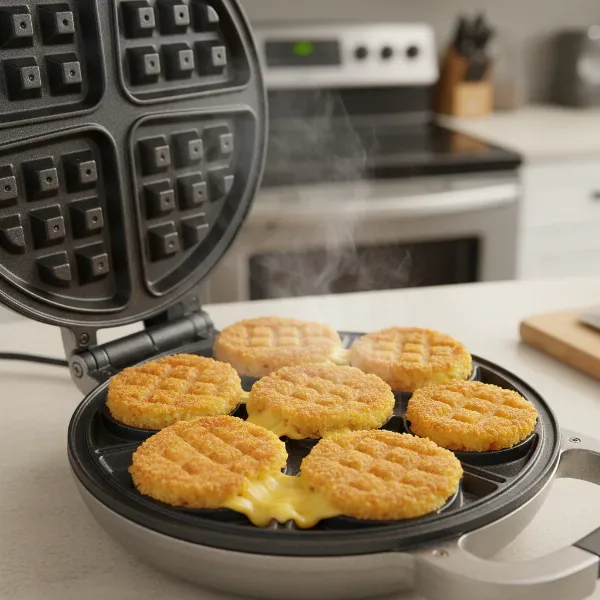 Golden brown crispy mac and cheese cooking inside a waffle maker, steam rising, delicious.
Elevate Your Mac and Cheese Bites: Recipes and Variations
The beauty of waffle maker mac and cheese bites is their adaptability. While delicious on their own, a few additions can take them to the next level.
Basic Crispy Mac and Cheese Bites:
- 2 cups cold, leftover mac and cheese
- 1 large egg, beaten (optional, for extra binding)
- 1/4 cup panko breadcrumbs (optional, for extra crisp)
- Non-stick cooking spray
Directions: Combine mac and cheese with beaten egg and panko, if using. Mix thoroughly. Follow the waffling steps above until golden brown and crispy.
Savory Add-ins:
- Bacon Bliss: Mix in 1/4 cup of cooked and crumbled bacon bits with your mac and cheese mixture before waffling.
- Jalapeño Kick: Add 1-2 tablespoons of finely diced pickled jalapeños for a spicy twist.
- Herbaceous Delight: Incorporate a tablespoon of fresh chopped chives or parsley for a burst of freshness.
Dipping Sauces:
Elevate the experience with a complementary sauce. Classic options include sriracha mayo, ranch dressing, buffalo sauce, or even a sweet and savory maple syrup for a surprising contrast.
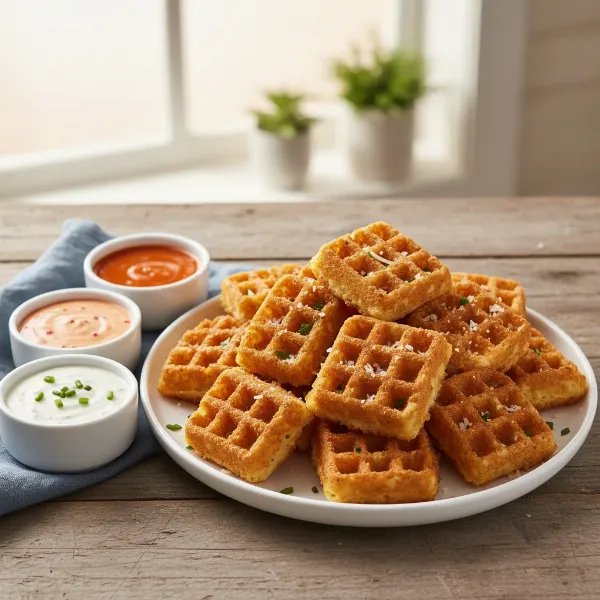 Crispy waffle mac and cheese bites on a plate with various dipping sauces, ready to eat.
Maintaining Your Machine: Cleaning After Mac and Cheese
After enjoying your delightful mac and cheese bites, proper cleaning of your waffle maker is essential to maintain its performance and longevity. Cheese, unlike waffle batter, can be particularly stubborn if left to harden.
- Unplug and Cool: Always unplug your waffle maker and allow it to cool completely before cleaning.
- Scrape Gently: Use a soft-bristled brush or a rubber spatula to gently scrape away any loose crumbs or solidified cheese. For tougher, stuck-on bits, dampen a paper towel or soft cloth with a little warm water and gently wipe.
- Wipe Clean: For non-stick plates, a damp cloth is usually sufficient to wipe away any remaining grease or residue. Avoid abrasive scrubbers or harsh detergents, which can damage the non-stick coating.
- Deep Cleaning (if needed): If your waffle maker has removable plates, these can often be washed in warm, soapy water or even in the dishwasher (check your manual). For fixed plates, a paste of baking soda and a little water can be gently applied to stubborn spots, left for a few minutes, then wiped away with a damp cloth.
- Dry Thoroughly: Ensure all parts are completely dry before storing your waffle maker to prevent rust or mildew.
Conclusion
The waffle maker is a truly versatile appliance, and using it to create crispy mac and cheese bites is just one of the many ways to unleash its potential. By following these simple steps—from preparing your mac and cheese with the right consistency and binders, to mastering the cooking process, and finally, to diligent cleaning—you can effortlessly transform leftovers into an exciting, new culinary experience. So, the next time you find yourself with a batch of macaroni and cheese, consider giving it the waffle treatment.
What other unexpected dishes have you tried in your waffle maker that surprised you?
Frequently Asked Questions
Can I use any type of mac and cheese for waffle bites?
While most mac and cheese recipes can work, cold, firm leftovers are ideal. Avoid very runny or watery mac and cheese, as it may not crisp up properly and can create a mess. Adding a binder like egg or panko can also improve results.
How do I prevent mac and cheese from sticking to the waffle maker?
Always preheat your waffle maker thoroughly and spray both plates generously with non-stick cooking spray, even if your machine has a non-stick coating. Ensure the mac and cheese mixture isn’t too wet, and don’t try to remove the bites before they’re fully crispy and set.
What kind of waffle maker is best for mac and cheese bites?
A waffle maker with deep grids (like a Belgian waffle maker) tends to work well for creating substantial, crispy bites. A good non-stick coating is crucial for easy release and cleanup. Mini waffle makers are great for smaller, appetizer-sized portions.
Do I need to add egg to my mac and cheese for waffling?
Adding a beaten egg to your cold mac and cheese mixture acts as a binder, helping the bites hold their shape better and creating a crispier texture. While not strictly necessary for all recipes, it’s highly recommended for optimal results, especially with looser mac and cheese.
How long does it take to cook mac and cheese bites in a waffle maker?
Typically, mac and cheese bites will cook in 3-5 minutes, or until they are golden brown and crispy on both sides. The exact time can vary depending on your Waffle Maker’s heat setting and the thickness of your bites. Monitor them closely to achieve your desired crispiness.