Have you ever gazed upon a humble tater tot and wondered if it could achieve a higher culinary destiny? If so, prepare to have your mind (and taste buds) blown by the glorious invention of Tater Tot Waffles, affectionately known as Totwaffles. This unexpected kitchen hack transforms ordinary frozen potato nuggets into incredibly crispy, savory waffles that are perfect for breakfast, brunch, or a fun side dish. With just a waffle maker and a bag of tater tots, you’re on your way to a delightful, golden-brown creation that’s quick to make and endlessly customizable.
The Phenomenon of Tater Tot Waffles: A Culinary Twist
Tater Tot Waffles are more than just a novelty; they’re a stroke of culinary genius that elevates the classic tater tot into a whole new experience. Imagine the crispy exterior and fluffy interior of your favorite potato side dish, but with the added surface area and unique texture that only a waffle iron can provide. This method creates a perfectly uniform crispness that’s hard to achieve through traditional frying or baking.
Why have Totwaffles taken kitchens by storm? It’s simple: they’re incredibly easy to make, require minimal ingredients, and offer a versatile canvas for countless flavor combinations. They serve as an exciting alternative to hash browns or home fries, offering a fun shape and satisfying crunch that appeals to all ages. This modern kitchen hack leverages the power of your waffle maker to press and cook the tater tots, creating a deliciously satisfying savory waffle without any complicated batters or extensive prep.
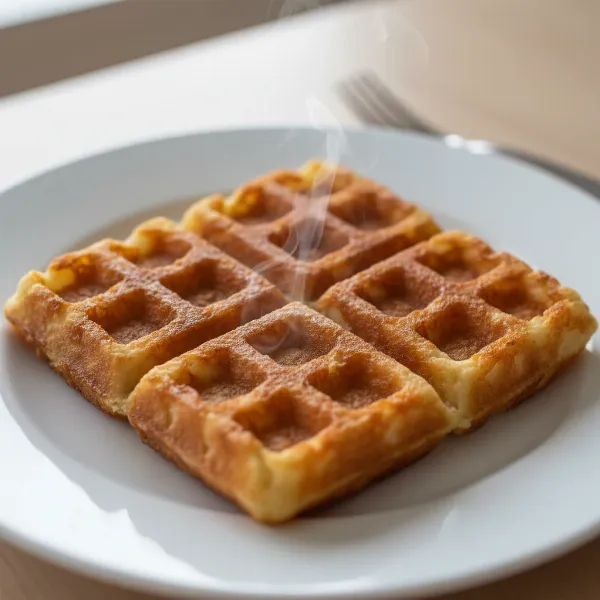 Golden-brown, crispy tater tot waffle with defined pockets, ready to be served for breakfast or brunch.
Essential Gear for Perfect Totwaffles: Choosing Your Waffle Maker
While the magic of Totwaffles lies in their simplicity, selecting the right waffle maker can significantly enhance your experience and the final product. Understanding the different types and features will help you achieve the crispiest, most perfectly formed potato waffles every time.
Type of Waffle Maker
The kind of waffle maker you own can influence the texture and appearance of your Totwaffles:
- Belgian Waffle Makers: These typically feature deeper grids, producing thicker Totwaffles with more pronounced pockets. This can result in a more substantial waffle that’s still crispy on the outside but retains a softer, fluffier interior.
- Classic Waffle Makers: With shallower grids, classic waffle makers tend to produce thinner, often crispier Totwaffles. The reduced thickness allows for quicker cooking and a more uniform crunch throughout.
- Rotating Waffle Makers: Some models, like the Cuisinart WAF-F4 Double Flip Belgian Waffle Maker, are designed to flip, ensuring an even distribution of ingredients and consistent browning on both sides. This can be beneficial for achieving uniform crispness across your Totwaffles.
- Mini Waffle Makers: For individual servings or bite-sized snacks, a mini waffle maker can create adorable and equally delicious small Totwaffles.
|
Our Picks for the Best Waffle maker in 2026
As an Amazon Associate I earn from qualifying purchases.
|
||
| Num | Product | Action |
|---|---|---|
| 1 | bella Classic Rotating Belgian Waffle Maker with Nonstick Plates, Removable Drip Tray, Adjustable Browning Control and Cool Touch Handles, Black |

|
| 2 | KRUPS 4-Slice Belgian Waffle Maker: Stainless Steel, 5 Browning Levels, Audible Ready Beep, Removable Plates, 1200W, Silver/Black, Large Waffle Maker Family Size, Great for Family Breakfasts |
|
| 3 | Dash Mini Waffle Maker- Compact Electric Iron for Creative Homemade Treats - Nonstick Surface - Easy-to-Clean - Perfect for Kids & Families - Aqua |
|
| 4 | Dash No-Drip Waffle Maker - Quad Waffle Maker for Hassle-Free Breakfasts - Dual Nonstick Heating Plates & Quick Heat-Up System - Easy-Release Surface - Silver |
|
| 5 | Elite Gourmet EWM015MX Electric Nonstick 4.5-inch Mini Waffle Maker, Belgian Waffles, Compact Design, Hash Browns, Keto, Snacks, Sandwich, Eggs, Easy to Clean, Mint |
|
| 6 | Cuisinart Waffle Maker, 1250W Round Classic Waffle Iron, 5-Setting Adjustable Browning Control, WMR-CAP2, Brushed Stainless |
|
| 7 | Cuisinart Round Flip Belgian Waffle Maker, Black/Silver, 1 inch thick, WAF-F30NAS |
|
| 8 | Cuisinart Waffle Maker, 1250W Round Classic Waffle Iron, 5-Setting Adjustable Browning Control, WMR-CANAS, Brushed Stainless |
|
| 9 | Waffle Maker, Rotating Belgian Waffle Maker, 180° Flip Waffle Iron, Non-Stick Plate, Adjustable Browning Control, Foldable Cool Touch Handle, Removable Drip Tray, Space Saving Storage, Stainless Steel |
|
| 10 | OSTBA Waffle Maker, 2 Slice Non-Stick Waffle Iron, Belgian Waffle Machine with Indicator Lights, PFOA Free, Perfect for Breakfast and Snacks, 750W |
|
Regardless of the type, the most crucial aspect is a good non-stick surface. This prevents the potato from sticking and breaking apart, making removal and cleanup much easier. While many waffle makers come with non-stick coatings, adding a light layer of oil or cooking spray is always a good practice when making Totwaffles to ensure optimal release.
Key Features to Look For
Beyond the basic type, a few features can make your Totwaffle-making process smoother:
- Adjustable Temperature/Browning Settings: The ability to control the heat allows you to fine-tune the crispness of your Totwaffles. Higher settings generally lead to a crispier result, which is often desired for these savory delights.
- Indicator Lights: Lights that signal when the waffle maker is preheated and when your food is cooked are incredibly helpful, taking the guesswork out of the process.
- Removable Plates: For the easiest cleanup, waffle makers with removable, dishwasher-safe plates are a dream. This is especially useful for Totwaffles, which can sometimes leave behind small potato bits or sticky residue.
- Drip Tray/Moat: Some waffle makers, like the Breville Smart Waffle Pro, include a moat or drip tray around the cooking grids to catch any overflow, minimizing mess.
Ultimately, while specialized features are nice, a reliable waffle maker with consistent heat and a good non-stick coating is all you truly need to embark on your Totwaffle adventure.
Step-by-Step Guide: Crafting Your Crispy Tater Tot Waffles
Making Tater Tot Waffles is surprisingly straightforward, turning a simple frozen ingredient into a gourmet-style side dish or snack. Follow these steps for crispy, golden perfection.
Preparation is Key
The secret to perfectly crispy Totwaffles starts even before they hit the hot grates of your waffle maker.
- Thawing the Tater Tots: Most experts agree that starting with thawed tater tots yields the best results. You can achieve this by leaving them in the refrigerator overnight or by microwaving them for 30-60 seconds to bring them to room temperature. Trying to waffle completely frozen tots can lead to uneven cooking and a tendency for them to break apart.
- Preheating the Waffle Iron: Always preheat your waffle maker fully. Set it to a medium-high or high setting to ensure the plates are hot enough to create an immediate crisp on the tots. A well-preheated iron is crucial for that desirable crunch.
- Greasing the Plates: Even if your waffle maker boasts a non-stick coating, it’s wise to lightly grease both the top and bottom plates with a neutral cooking spray or a brush of melted butter or oil. This extra step guarantees easy release and helps achieve an even crispness.
Waffling the Tots
Now for the main event! Transforming those thawed tots into golden waffles.
- Arrangement: Open your preheated and greased waffle maker. Carefully arrange the thawed tater tots in a single, even layer across the entire surface of the bottom plate. Pack them as closely together as possible, aiming to fill any gaps. This tight arrangement helps them fuse into a cohesive waffle rather than individual crispy tots. For a Belgian-style maker, you might even layer them slightly for a thicker Totwaffle.
- Seasoning (Optional but Recommended): Lightly season the tater tots with salt, pepper, or your favorite spices like garlic powder, paprika, or Cajun seasoning before closing the lid. This infuses flavor directly into the Totwaffles.
- Closing the Lid and Cooking: Gently but firmly close the lid, pressing down to flatten the tots. The initial resistance will lessen as they cook and soften. Cook for approximately 5-12 minutes, or until the Totwaffle is deeply golden brown and wonderfully crispy. Cooking times can vary based on your waffle maker’s power and your desired level of crispness; longer cooking generally results in a crunchier outcome. Monitor closely to prevent burning.
- Filling Gaps (Optional): Some recipes suggest that a few minutes into cooking, you can lift the lid and fill any “holes” that appear with additional tater tots to create a more solid waffle.
The Big Reveal
Once cooked to perfection, carefully retrieve your Totwaffle and prepare to enjoy!
- Careful Removal: Use a fork or a non-scratch utensil to carefully lift the crispy Totwaffle from the iron. Its structural integrity should be solid, but a gentle touch ensures it stays intact.
- Serving Batches: If making multiple Totwaffles, transfer the cooked ones to a plate and keep them warm in a low oven (around 200°F / 95°C) while you prepare the remaining batches. Serve immediately for the best texture and flavor.
Beyond the Basics: Delicious Tater Tot Waffle Variations and Toppings
The beauty of Tater Tot Waffles lies not only in their ease of preparation but also in their incredible versatility. Once you’ve mastered the basic Totwaffle, a world of delicious variations and toppings awaits, transforming them from a simple side into a culinary centerpiece.
Savory Sensations
Embrace the savory potential of Totwaffles with these crowd-pleasing combinations:
- The Classic “Loaded Baked Potato” Style: This is a fan favorite for a reason. Top your hot Totwaffle with a dollop of sour cream, a sprinkle of shredded cheddar cheese, crispy bacon bits, and fresh chopped chives or scallions.
- Breakfast Boost: Transform your Totwaffle into a hearty breakfast meal. Serve it alongside scrambled or fried eggs, slices of avocado, and a side of your favorite breakfast sausage or ham. A runny egg yolk provides a luxurious sauce that complements the crispy potato perfectly.
- Spicy Kick: For those who enjoy a bit of heat, drizzle your Totwaffle with hot sauce, a dash of sriracha, or even a sprinkle of red pepper flakes during the cooking process. You can also mix Cajun seasoning directly with the thawed tots for an infused spice.
- Herb-Infused: Finely chop fresh herbs like parsley, cilantro, or rosemary and mix them in with your thawed tater tots before waffling. This adds a fragrant and fresh dimension to the crispy potato base.
- Cheesy Delight: For an extra gooey texture, sprinkle shredded cheddar or a melty cheese blend over the tater tots a minute or two before the Totwaffle is fully cooked, allowing it to melt and adhere.
Unexpected Combinations
Don’t be afraid to get creative! Totwaffles can serve as a surprising base for many dishes.
- Totwaffle Sandwiches: Use two Totwaffles as the “bread” for a unique sandwich. They make excellent buns for sliders, sloppy joes, or even a grilled cheese with a crispy potato twist.
- Pizza Totwaffles: Spread a thin layer of pizza sauce over a Totwaffle, add mozzarella cheese and your favorite mini toppings (like pepperoni or diced peppers), then broil briefly until the cheese is melted and bubbly.
- Lox and Crème Fraîche: For a sophisticated appetizer or brunch item, spread a layer of crème fraîche (or softened cream cheese) over a Totwaffle, then top with smoked salmon, capers, thinly sliced red onion, and fresh dill.
“Tater Tot Waffles are a testament to kitchen creativity – transforming a freezer staple into a versatile, crispy delight that truly shines with the right toppings.” – Chef Alex Chen, Culinary Innovator
The possibilities are truly endless. From hearty comfort food to elegant appetizers, Totwaffles invite you to experiment and discover your next favorite dish.
Maintaining Your Waffle Maker: Cleaning After Totwaffle Fun
While Tater Tot Waffles are delicious, they can sometimes leave behind a bit more residue than traditional batter. Proper cleaning ensures your waffle maker remains in top condition and ready for its next culinary adventure.
Immediate Cleanup (After Cooling)
The key to easy cleaning is addressing the mess promptly, but always with safety in mind.
- Unplug and Cool: Crucially, always unplug your waffle maker and allow it to cool completely before you begin cleaning. Attempting to clean a hot appliance can lead to burns or damage to the unit.
- Wipe Away Crumbs and Excess Oil: Once cool, use a dry paper towel, a soft-bristled brush, or a damp cloth to gently wipe away any loose crumbs, potato bits, or excess oil from the cooking plates. For oil collected in the grid, fold a paper towel into a point or wrap it around a chopstick to absorb grease from the crevices.
Deep Cleaning for Sticky Residue
Sometimes, simple wiping isn’t enough, especially if some potato starches have baked onto the non-stick surface.
- Baking Soda Paste Method: For stubborn, sticky residue, create a paste using baking soda and a few drops of water or hydrogen peroxide. Spread this paste over the affected areas of the cool cooking plates and let it sit for at least an hour, or up to 45 minutes for lighter residue. The paste will help absorb oil and loosen baked-on bits. Afterward, wipe away the paste with a damp cloth, ensuring no baking soda remains, then dry thoroughly with a microfiber cloth.
- Soapy Water and Brush for Crevices: If your waffle maker has non-removable plates, dip an old toothbrush or a non-abrasive sponge into warm water with a few drops of dish soap. Gently scrub the grooves to dislodge any remaining residue. Wipe down the plates with a clean, damp cloth to remove all soapy residue, then dry.
- Removable Plates: If your waffle maker features removable plates, lucky you! Once cool, carefully detach them and wash them by hand in warm, soapy water. For heavy residue, they can often be soaked briefly. Always check your appliance’s manual, as some removable plates might be dishwasher safe.
- Drying Completely: Before storing your waffle maker, ensure all parts are thoroughly dry. This prevents moisture buildup, which can lead to mold or damage over time.
Regular cleaning after each use, especially after making greasy items like Totwaffles, will prolong the life of your waffle maker and ensure consistent, delicious results for years to come.
Conclusion
Tater Tot Waffles, or Totwaffles, are a testament to the joy of culinary experimentation, transforming a freezer-aisle staple into an unexpectedly gourmet and versatile dish. From their irresistible crispness and savory flavor to the ease with which they can be prepared and customized, Totwaffles offer a delightful twist on your usual breakfast or side dish routine. By following simple steps—thawing the tots, preheating your waffle maker, and packing them tightly—you can achieve perfect golden-brown results every time. And with an endless array of toppings, from classic loaded potato fixings to creative sandwich concepts, your Totwaffle journey is just beginning. So, why not embrace this simple yet brilliant kitchen hack and elevate your tater tots to their waffled potential today? What unique topping will you try first on your crispy Totwaffles?
Frequently Asked Questions
Do you have to thaw tater tots first to make totwaffles?
Yes, for the best and most even cooking, it is highly recommended to thaw tater tots to room temperature before placing them in the waffle maker. You can do this by letting them sit out or microwaving them briefly for 30-60 seconds. Using frozen tots can lead to uneven cooking and may cause them to break apart in the waffle iron.
What kind of waffle maker is best for totwaffles?
A waffle maker with a good non-stick coating and consistent heat is ideal for totwaffles. Both Belgian (deep grid) and classic (shallow grid) waffle makers work well, producing thicker or crispier results, respectively. Features like adjustable temperature settings and removable plates can also enhance the experience and simplify cleanup.
How long do totwaffles take to cook?
Cooking time for totwaffles typically ranges from 5 to 12 minutes, depending on your waffle maker’s heat setting and your desired level of crispness. Always cook until they are deeply golden brown and firm, pressing down firmly on the lid to ensure even contact and maximum crunch.
Can I make totwaffles ahead of time?
While totwaffles are best enjoyed immediately for optimal crispness, you can make them ahead of time. Store cooled leftovers in an airtight container in the refrigerator for up to 3-4 days. To reheat, place them back in the waffle maker, an air fryer, or an oven until crispy again.
What are the best toppings for totwaffles?
Popular toppings for totwaffles include classic choices like sour cream, shredded cheese, crispy bacon bits, and chopped scallions for a “loaded potato” effect. Other delicious options include fried eggs, hot sauce, avocado slices, or even using them as buns for mini sandwiches or pizza bases.